Monday, May 5, 2014

The Berry Green Giant-Kick to All That Ails You

Yes, paired with the energy bites from the previous post, this tall glass of antioxidant, immune boosting, anti-inflammatory, healthy goodness will kick just about anything on its ass while filling you chock-full of nutrients to keep you going.  I try to have one of these, at the least, three or four times a week even if it's for dinner.


Ingredients:

A couple of things to consider to get the most out of your creation:
  • Fresh is the best and Organic Non-GMO is even better. Don't make your body fight harder than it needs to by putting in things it has to decipher how to digest.
  • If you can't do fresh, flash-frozen, organic, Non-GMO is better.
  • A good blender is a good investment.  I'm still using a 12 year old blender my ex-husband got me for our first Christmas together.  (I should have seen the signs right there...) It is functional, but if you really want to get things smooth and blended well, pull out that pocket book and get yourself one of those new-fangled deals that runs on a reduced scale jet engine....You wont regret it I promise.  (picks a chia seed out of teeth)
  • If you're a picky foodie, don't put a lot of weight on each individual ingredient; I promise you there are some that will make you go "WTF?".  You're not going to be able to taste them all and really, if it was between death and cilantro you'd pick cilantro right?  RIGHT?!!!
 Ok, then, here we go:

1 banana  not over ripe
1/2 avacado (but for some of you, you better eat the other half of that avacado while you're making this because you need it.)
1 Handful of spinach leaves
5 large Basil leaves
10-15 Cilantro leaves
1 or 2 TBLS of Chia Seeds
1 large Dollop of plain Yogurt
1/4 cup of almond or organic soy milk (Soy is better because of the protein but only if it's organic/Non-GMO
1 2" finger of ginger
A pinch of Tumeric
1/8 tsp of Cinnamon
2 heaping TBLS of brewers yeast
1/2 Tbls of Raw Honey
1 heaping Tbls of Peanut Butter
1 Tbls of fresh squeezed Lemon


Mix these in your turbo-blender till silky smooth.  Add more soy or Almond Milk as needed if  too thick.

Drink it down!!!


Saturday, March 8, 2014

Getting Your Energy On...One Bite at a Time

One of my biggest challenges to eating healthy isn't always the food I eat but eating regular, balanced meals especially when I am working. At first I was making mini-meals, but soon found that anything I couldn't grab and eat on the run just stayed in my backpack (sometimes till it developed its own language...) and then I would be starving and eat everything in sight when I got home. So, I started packing snacky things; Veggies, oat crackers, cheese, lunch meats, etc.  This should have worked except I would usually only manage to grab one or two pieces (generally the cheese) thus no balance and still the rotten food in the backpack issue.

I thought I found something good in cliff bars and Kind Bars till I read the sugar content, and the same with health shakes (those don't come out the other end too well after a few days either...).  Then I started seeing these things called Energy Bites in the bulk section at the store. Looking at the ingredients I thought I found something good; coconut oil, nuts, seeds, and dried fruits.  All this goodness could be mine for $9.98 a pound. These are dense little suckers so you don't get too many in that pound.  So we make them!


Ingredients:

9 Dates
7 Figs
1/2 cup Cranberries
1/2 cup Raisens
1/2 cup dried blueberries
1/4 cup Pumpkin seeds ground
1/4 cup Sunflower seeds ground
1/2 cub Almonds ground
1/2 cup Dark Chocolate chips ground
1/2 cup Chia Seeds
1/4 cup Ground Flax
1/2 Oats coarsely ground
2 tbls Cinnamon
1 tbls Ginger
1 tbls Cloves
1 tbls Tarragon
1/4 cup Peanut butter
1/4 cup Coconut Oil
2 tbls Honey
2 tsp Vanilla

As always, these recipes are approximate.  Adjust to taste.  The main binder is actually the dried fruit so feel free to experiment; dried apricots, dried cherries, prunes, etc.  I have found more dates give the bars a sweeter taste, whereas more figs make them a little tart.

In the food processor; grind/mince the dried fruit.  In my little food processor I need to do fruit group separately and I dice the figs and dates before mincing them.  If you have something a little more powerful you might not have to do that.  Pulse the processor till the fruit is in crumbles and toss them in the bowl.

Grind the nuts and seeds to a consistency between crumbs and powder. Do the same with the Oats and toss into the bowl with the fruit.

Melt the coconut oil and add the honey vanilla but don't let it boil.

Add the remainder of the ingredients and mix with your hands.  The mixture will be wet and sticky but shouldn't be runny.


Once mixed press into baking dish.  I usually make them about 3/4" to 1" thick.  Be sure to press them in firmly and then put them in the fridge till firm.


Slice into cube size of choice.


I usually store these in the fridge if I am making large batches, but they don't need to be kept cold through the day and are great for hikes or weekend trips if you don't have a fridge.  

Wednesday, February 12, 2014

Yummy Pizza Goodness With Fewer Carbs and Half the Guilt

This year I moved to an area that had more restaurants than the whole north eastern side of the state where I moved from.  Among these were not one but two of each of my favorite Pizza places; Abbey's and Pappa Murphy's.  The first month after moving in, I indulged in grabbing one of those bad-boys with extra cheese every time I had to go into town with every intention of laying off once I got settled.  But over the next several months, as life threw several more curve-balls and the stress amped up, I found myself giving into the pizza cravings to the tune of at least two extra large ones per month.  This translated to pizza for almost every meal for two weeks a month!  To top it off, my job change had me tied to a desk most of the summer.  My activity level at worked tanked, and my activity level at home wasn't much better.

Luckily, I clued in before getting to the point of having to look into larger uniform pants, but not before undoing a lot of work I had put into myself last year.  I managed to break it off with my pie-dealers but the cravings were still strong...And that's when I found love in an unexpected place...

CAULIFLOWER!!!

 Thanks to the joys of the internet and the trending health fad, I have discovered that cauliflower isn't just for dipping into cheese!  Several rounds of experimenting and I have perfected my Caulizza!  While it's not real pizza, it definitely hits the spot on the weekend and leaves one feeling guilt free to enjoy your favorite Alcoholic Beverage.


Ingredients:

1 Head of Cauliflower
1 Egg (2 for a fluffier crust)
1 tsp of baking soda
1/2 tsp of baking powder
Garlic Cloves
1/2 Tbls Dried Oregano
1/2 Tbls Dried Parsley
1/2 Tbls Dried Basil
1 Tbls of Olive Oil
Mozzarella
Parmesan
Your Toppings of Choice

Cut the head of the cauliflower into small chunks, throw it into a food processor and crank that baby up till the cauliflower is about the consistency of cous cous.  Then put it into a microwave safe bowl and nuke for 5 minutes....OR..if you are like me and don't like scrambling your food, throw it in a strainer and steam over a pot of boiling water for 6 minutes.

While waiting the cauliflower grate about a cup of Mozzarella, 1/2 a cup of Parmesan, and I like to throw in about 1/3 or so of a cup of chedder.  This I also throw in the food processor and dice it till its nice and evenly crumbled.  Also dice one or two garlic cloves in the mixer.

Once the cauliflower is done steaming (or nuking) put it in the middle of some paper towels or tea cloth and wring the residual water from it.  This is very important!  I usually throw it back in the mixer for a few minutes till it's consistency is close to mashed potatoes.

Throw it in a mixing bowel with the cheese, herbs, and baking soda and powder. Throw the egg(s) in the mixer for a couple of minutes before adding.  Now get your hands in there and moosh it all together.  At this point I usually throw in some ground flax seed and a tbsp oatmeal and sorghum flour.  I have made this recipe with and without.  I like the flax for the added fiber, and think the flours make it a little denser, but otherwise don't notice much difference one way or the other.

 Now get your hands in there and mix it UP!

The  dough should have a loose, wet consistency, but it shouldn't be runny.  Preheat your oven to 375.  Line a cookie sheet with parchment paper greased with olive oil or butter. I like to sprinkle a little it of Parmesan on paper for some added flavor.  Roll the dough into two balls (or just one if you want one large pizza) and flatten.


Bake for about 20 minutes or until the edges are browning slightly and the center has risen and is firm.

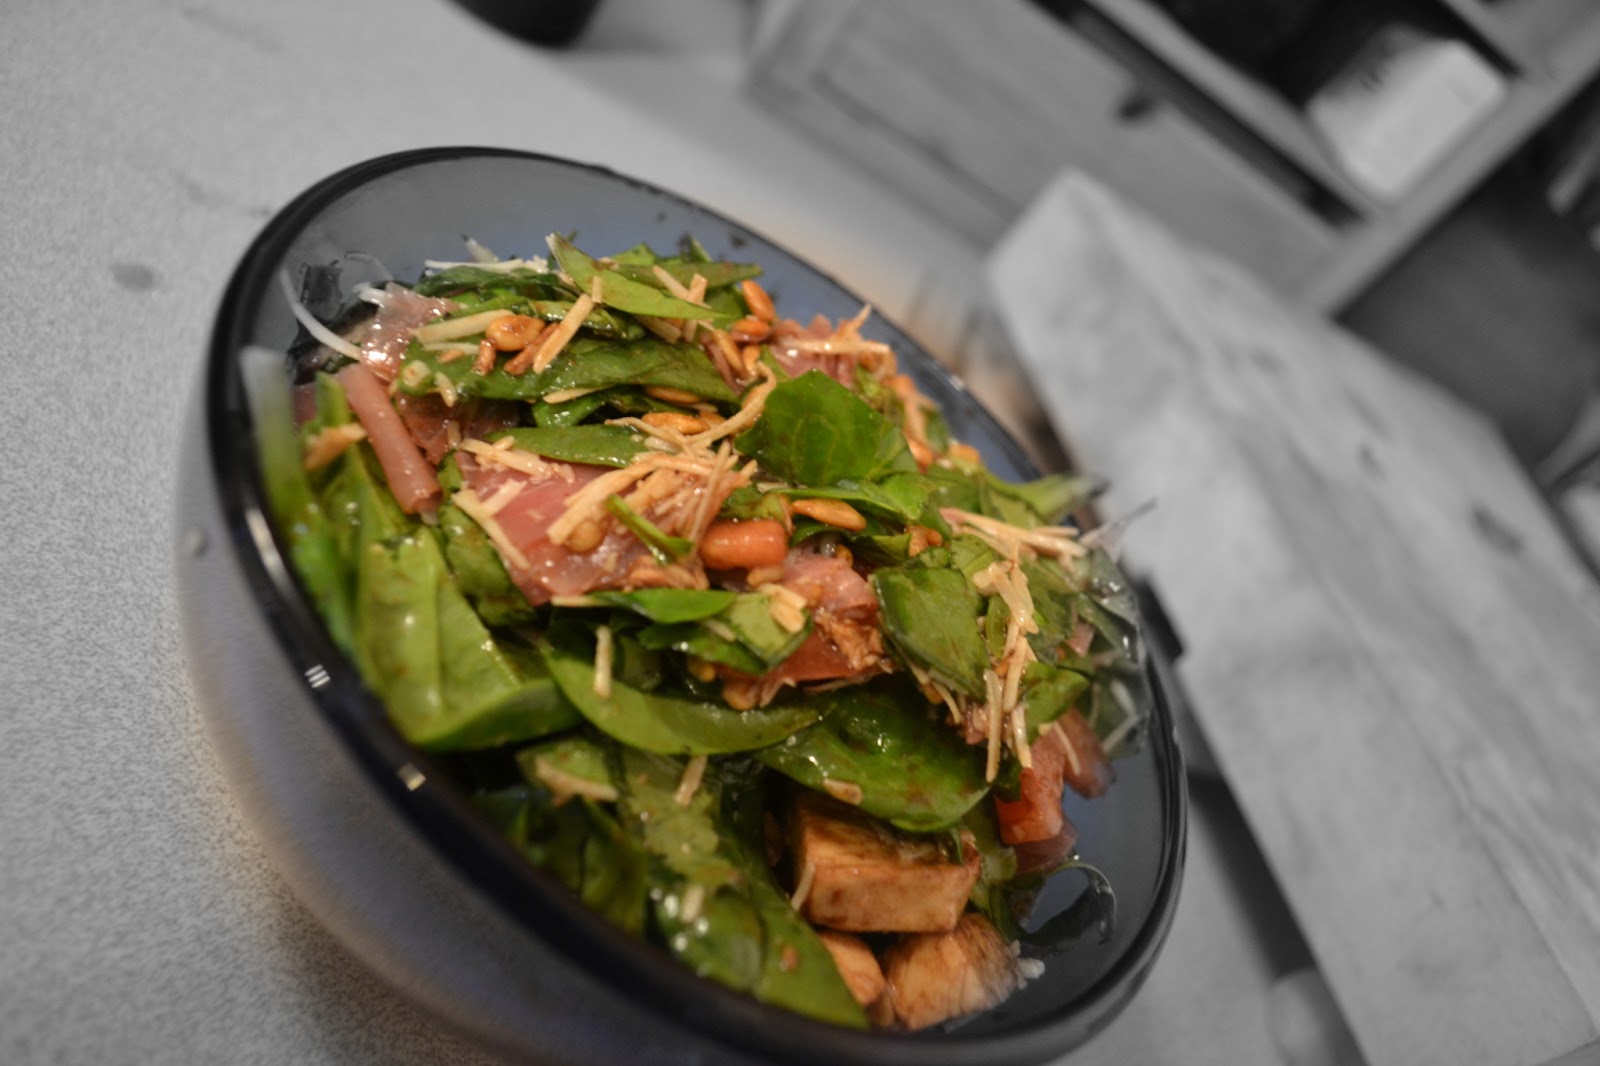
Now add your favorite ingredients!  Another note: things like mushrooms, spinach, zucchini, etc have a high moisture content.  I usually grill these a little before adding as the extra moisture will make the crust soggy.

Now throw those puppies in the oven!  Cook for about 15-20 or until the cheese is melty and browning.


It looks yummy, but be patient and let it cool for a few minutes....


And then ENJOY!!! :)

Saturday, February 8, 2014

Thai Peanut Curry Revival

I have found that my posting pattern is "Annually".  That being said; new year, new commitments.  Actually, compared to my last post, I have done fairly well keeping to my 2013 commitment of abstaining from wheat with the exception of a brief period in which a job transfer put me in an area with not one, but TWO Abbey's Pizza restaurants...This was a dark time for me...dark and delicious.  But moving on!  In that time I have accumulated a wealth of new recipes and delights for those looking for deliciousness in a wheat-free world, and I will post these over the course of this weekend,starting with:


Thai Peanut Curry Soup!

It's been a cold winter.  Cold with no snow and after a time the body craves something to warm it to from the bones out.  I actually have never had any type of Curry Soup but being familiar with the flavors and having crossed some savory looking pictures in my recipe hunts I decided this would hit the spot nicely.

  Ingredients:

Peanut oil
Sesame Oil
Coconut Oil
Flour
Curry Powder
Salt
Pepper
Chicken (or meat of choice)
Diced Garlic
Diced Ginger
Diced Chili Pepper (heat to preference)
 Red Curry Paste
Peanut butter
Coconut Milk
Chicken Broth
Carrots
Mushrooms
Green Onions
Chili Powder
Cayenne Pepper
Cilantro
Lemon Juice
Fish Oil
Soy Sauce

So, first disclaimer: I cook from Scratch; a handful of this and a pinch of that. I will see what I can do to translate that into a recipe.  I will use the amounts I made for this batch which I think made about three or four servings.

Take four chicken thighs or two breasts. Cut them up into 1/4"cubes.  Take about a 1/4 cup of flour, (if gluten free do a mixture of almond, sorghum,and or garbanzo.) 1/2 tbsp of Curry powder, 1/2 tsp of salt, and a pinch of pepper.  (I usually taste test.  The flavor should be stronger than what you want)  Toss the chicken and the Flour mixture.

Heat a pot with a tablespoon of Peanut Oil, a Tablespoon of sesame oil, and a Tablespoon of Coconut Oil. Heat at Medium/ medium high (will depend on the heat of your stove).  The oil should be hot, but not smoking.  Throw in the chicken and let it fry for about fiveish minutes till all sides are whitish. Don't worry about cooking it through yet; it will finish cooking as it sits and when mixed with the rest of ingredients. When done remove Chicken

In the same pot, without cleaning it, add oil if needed and toss in 1/2 tsp Red curry paste the diced ginger, garlic and chili peppers. Saute for several minutes before adding a half a cup of the chicken broth and mix in all of the residual oils and flavors.

Reduce heat and mix in about 1/4 cup of Peanut butter and 1/2 cub of Coconut milk...add slowly and stir constantly until blended.  Add several shakes of fish oil and soysauce to taste.

Add about two cups more of broth.  Add one full carrot, quartered and diced, or sever handfuls of mini carrots diceds. Add mushrooms. Add a tablespoon of Curry.  Mix and let simmer for about five minutes.

Add Chicken back to pot.

Add another 1/4 of peanut butter and mix.  Add about 1/4 tsp of chilli powder and pinches of Cayenne to taste.  Add Coconut milk if needed to thicken, or broth to thin.

Dice up Cilantro and Green Onion and add to mixture.

Taste and season to preference; more curry, cayenne, Fish Sauce, Soy Sauce, etc.

Enjoy with Cabbage or Rice or Solo.

Saturday, February 16, 2013

Caprese, Kitchen Sink Style!

It's that time of year where we all make promises which we sometimes intend to keep.  In my case I am working on recommitting myself to the wheatless life.  After success in training and finishing in the 2012 Portland Duathalon, I am setting my sights higher with the hopes of improving my time and loosing that little unattractive bulge...I also have been called up to do a work training and I'd REALLY like to fit into my dress uniform.  This calls for committing to healthier lifestyle choices over the winter...AFTER the Holidays of course.  So,that being said, I'd like to present my version of a personal favorite...not as fancy as the restaurant, but much easier to enjoy while curled up on the couch watching a movie.  :)


Ingredients:

Olive Oil
Balsamic Vinegar
Fresh Basil Leaves
Spinach
Tomatoes (I prefer Cherry)
Fresh Mozzarella
Prosciutto
Parmesian
Honey roasted sunflower seeds

Mix equal amounts of olive oil and balsamic vinegar, enough to coat the amount of the other ingredients in the salad.


Slice mozzarella into quart-inch slices and again into chunks.  If using large tomatoes, cut into chunks. Toss both into dressing mixture and let sit while preparing the rest of the ingredients.

Loosely chop Spinach leaves and several basil leaves and mix into the bowl.  Grate the Parmesan, slice prosciutto, add a handful of sunflower seeds, and toss together.


Now, pour yourself a glass of red wine and, if you feel good about cheating on your diet, grab a slice of Seattle's Bay Front Sourdough and enjoy!


Sunday, January 22, 2012

Oat Flour Pancake

Wow...It's been a long time since I've been on here.  I'm a bad blogger.

So, demands for my oat flour pancake recipe have moved me to pull out the camera and dust off this blog...wait, what's that...what happened to no grains, you ask?  Phhhsshh.....mumble, mumble mumble....

Anyhoo....

...It being a snowy, cozy Sunday, this seems to be the perfect day to make said pancakes.  So, let's begin.

FIRST, my disclaimer:

Disclaimer:
  1. All of my recipes are made from scratch, usually to taste and I don't usually take measurements so the measurements listed here are approximate.  It is up to the chef to take frequent taste tests and be free to make their own modification according to their own palate.
  2. There is no fear of solid or animal fats in this kitchen.  Substitutes using oils of your choice is permitted.  Cutting fats completely is also permitted.  It is encouraged to try the recipe as it is before making changes...if guilt of said scary fats if a concern, follow eating pancakes with three miles of snow shoeing and a half hour of jogging in place...it'll take care of that guilt in no time.
  3. If modifications are made please share the results because we all like to try new things.
OK!  Let's get started:

The Cast


1/2 cup           Oat Flour
1 Tbls             Rice Flour (optional)
1/4 tsp            Baking Powder
1/2 tsp            Baking Soda
1                     Egg
1 tsp               Bacon drippings (In my case, sometimes two...^.^)
Splash            Vanilla
1/2 Cup          Buttermilk
2 pats              Butter
To taste          Salt


This recipe makes two large pancakes so if you're cooking for more just double, triple, quadruple accordingly.

First mix all dry ingredients except salt, save the salt for last. Slowly, mix in buttermilk, bacon drippings, and vanilla.  If you have no fear of raw eggs you may also mix in the egg, however if salmonella is a phobia of yours, save the egg for last till after you've tasted your mixture. 


The mixture should be somewhat runny.

Taste test time...remember, with salted butter, bacon drippings, the baking powder, and soda there will already be a lot saltiness so it's better to taste and salt to your preference. 

Heat your skillet on a low medium heat.  I use a cast iron pan so it runs warmer than regular pans.  Melt a half a pat of butter and let it spread evenly in the pan.


Pour about half of the pancake batter into the pan and let it cook till nice little bubbles form around the edges and the top begins to lose it's sheen.  Lift the pancake with your flipper (the wider the better).  Throw another half pat of butter on the pan and let it melt and spread before flipping the pancake to it's other side.  Cook till this side is nice and brown.


Nice bubbles....it's about ready to flip.

Repeat till you have a stack of pancakes and the batter is gone.

Serve with your choice of syrup, butter, yogurt dressing, fruit, or in my case egg.


Follow with a cinnimon mocha and spend the rest of the day relaxing.  :)


Tips and tricks....

I have found that using saved bacon drippings (always stored in the fridge in a container of course) are much saltier tasting than fresh drippings.

I usually pull my pan off the burner and wipe it clean between pancakes.

Many of the recipes I've explored use sugar.  I just chose not to...doesn't mean you shouldn't.

The cinamon mocha is optional....you could also have a vanilla mocha or an almond mocha or a mint mocha or a hazelnut mocha or a..........


Sunday, March 20, 2011

Getting Your Ruffage

Coming up with sides for dinner can be a pain.  Being used to having pasta, mashed potatoes, or rice as faithful companions for my meat not having those options can make dinner a challenge. Seriously, there's only so many nights you can open a can of peas or green beans for dinner.

The Broccoli Salad is an oldie but a goodie.  Delicious, nutritious, and VERY VERY EASY.


Randi's Broccoli Tree Salad

Ingredients 
Broccoli
Onion
Carrots
Dried Cranberries
Honey Roasted Sunflower Seeds
Extra Sharp Chedder
Mayo
Vinegar
Cumin
Garlic Powder
Instructions
This is one of those "make to taste" recipes....meaning there are no set amounts and requires the cook to be in touch with their inner taste buds. 
Dice that broccoli into little tiny pieces.  This is a good way to take out pent up frustration....Whack that veggie! 
Throw the broccoli in your mixing bowl 
Dice that Carrot into little tiny pieces.  More frustration venting...WHACK WHACK WHACK! 
Throw the carrot in your mixing bowl.
Dice that onion. More frustration venting but don't cut your fingers off ;).
Throw the onion in your mixing bowl.
Add a handful of cranberries.
Add a handful of Sunflower Seeds.
Shred some cheese.

If you have diced and chopped correctly, your bowl of salad goodness should look like the photo below:


Don't be discouraged if your bowl looks a little less than orderly...it's all going to get mixed up anyway once you add a couple dollops of mayo, a tablespoon of vinegar, and a couple shakes of garlic powder and cumin.  That being done and a few stirs and your salad will look like this:


At this time I usually throw the whole deal into the fridge while I finish making dinner.  This gives the flavors of the salad time to meld into each other.

And there you go.  A perfect side and means of veggie goodness.